Master Folder Navigation on Windows with Zoxide: A Step-by-Step Guide
Introduction
Navigating through folders on Windows 11 can sometimes feel clunky. The conventional File Explorer works, but it lacks the intelligence to make your workflow truly efficient. Enter Zoxide, a smart command-line tool that learns your directory habits and lets you jump to any folder with just a few keystrokes. This guide will walk you through installing, configuring, and using Zoxide on Windows, transforming how you move between directories forever.
What You Need
- Windows 10 or 11 (64-bit recommended)
- PowerShell 5.1+ or Windows Terminal (for best experience)
- Internet access for downloading Zoxide
- A command-line familiarity (basic knowledge of running commands)
Step 1: Install Zoxide
Zoxide can be installed via winget (the Windows package manager) or manually. The easiest method is using winget. Open PowerShell or Command Prompt as Administrator and run:
winget install zoxideIf you prefer manual installation, visit the official releases page, download the latest .exe for your system, and place it in a folder that's in your PATH (e.g., C:\Windows\System32 or a custom directory).
Step 2: Configure Shell Integration
For Zoxide to work seamlessly, you need to hook it into your shell. Open your PowerShell profile script by typing:
notepad $PROFILEIf the profile file doesn't exist, create it. Add the following line:
Invoke-Expression (& { (zoxide init powershell | Out-String) })Save the file and reload your profile with . $PROFILE (or restart your terminal). For Command Prompt, use zoxide init cmd in a similar fashion, but PowerShell is highly recommended due to richer features.
Step 3: Learn Basic Navigation
Once installed, navigate to a few directories manually so Zoxide can learn your patterns. Then use the z command to jump. For example, if you frequently visit C:\Users\YourName\Documents\Projects\MyApp, you can simply type:
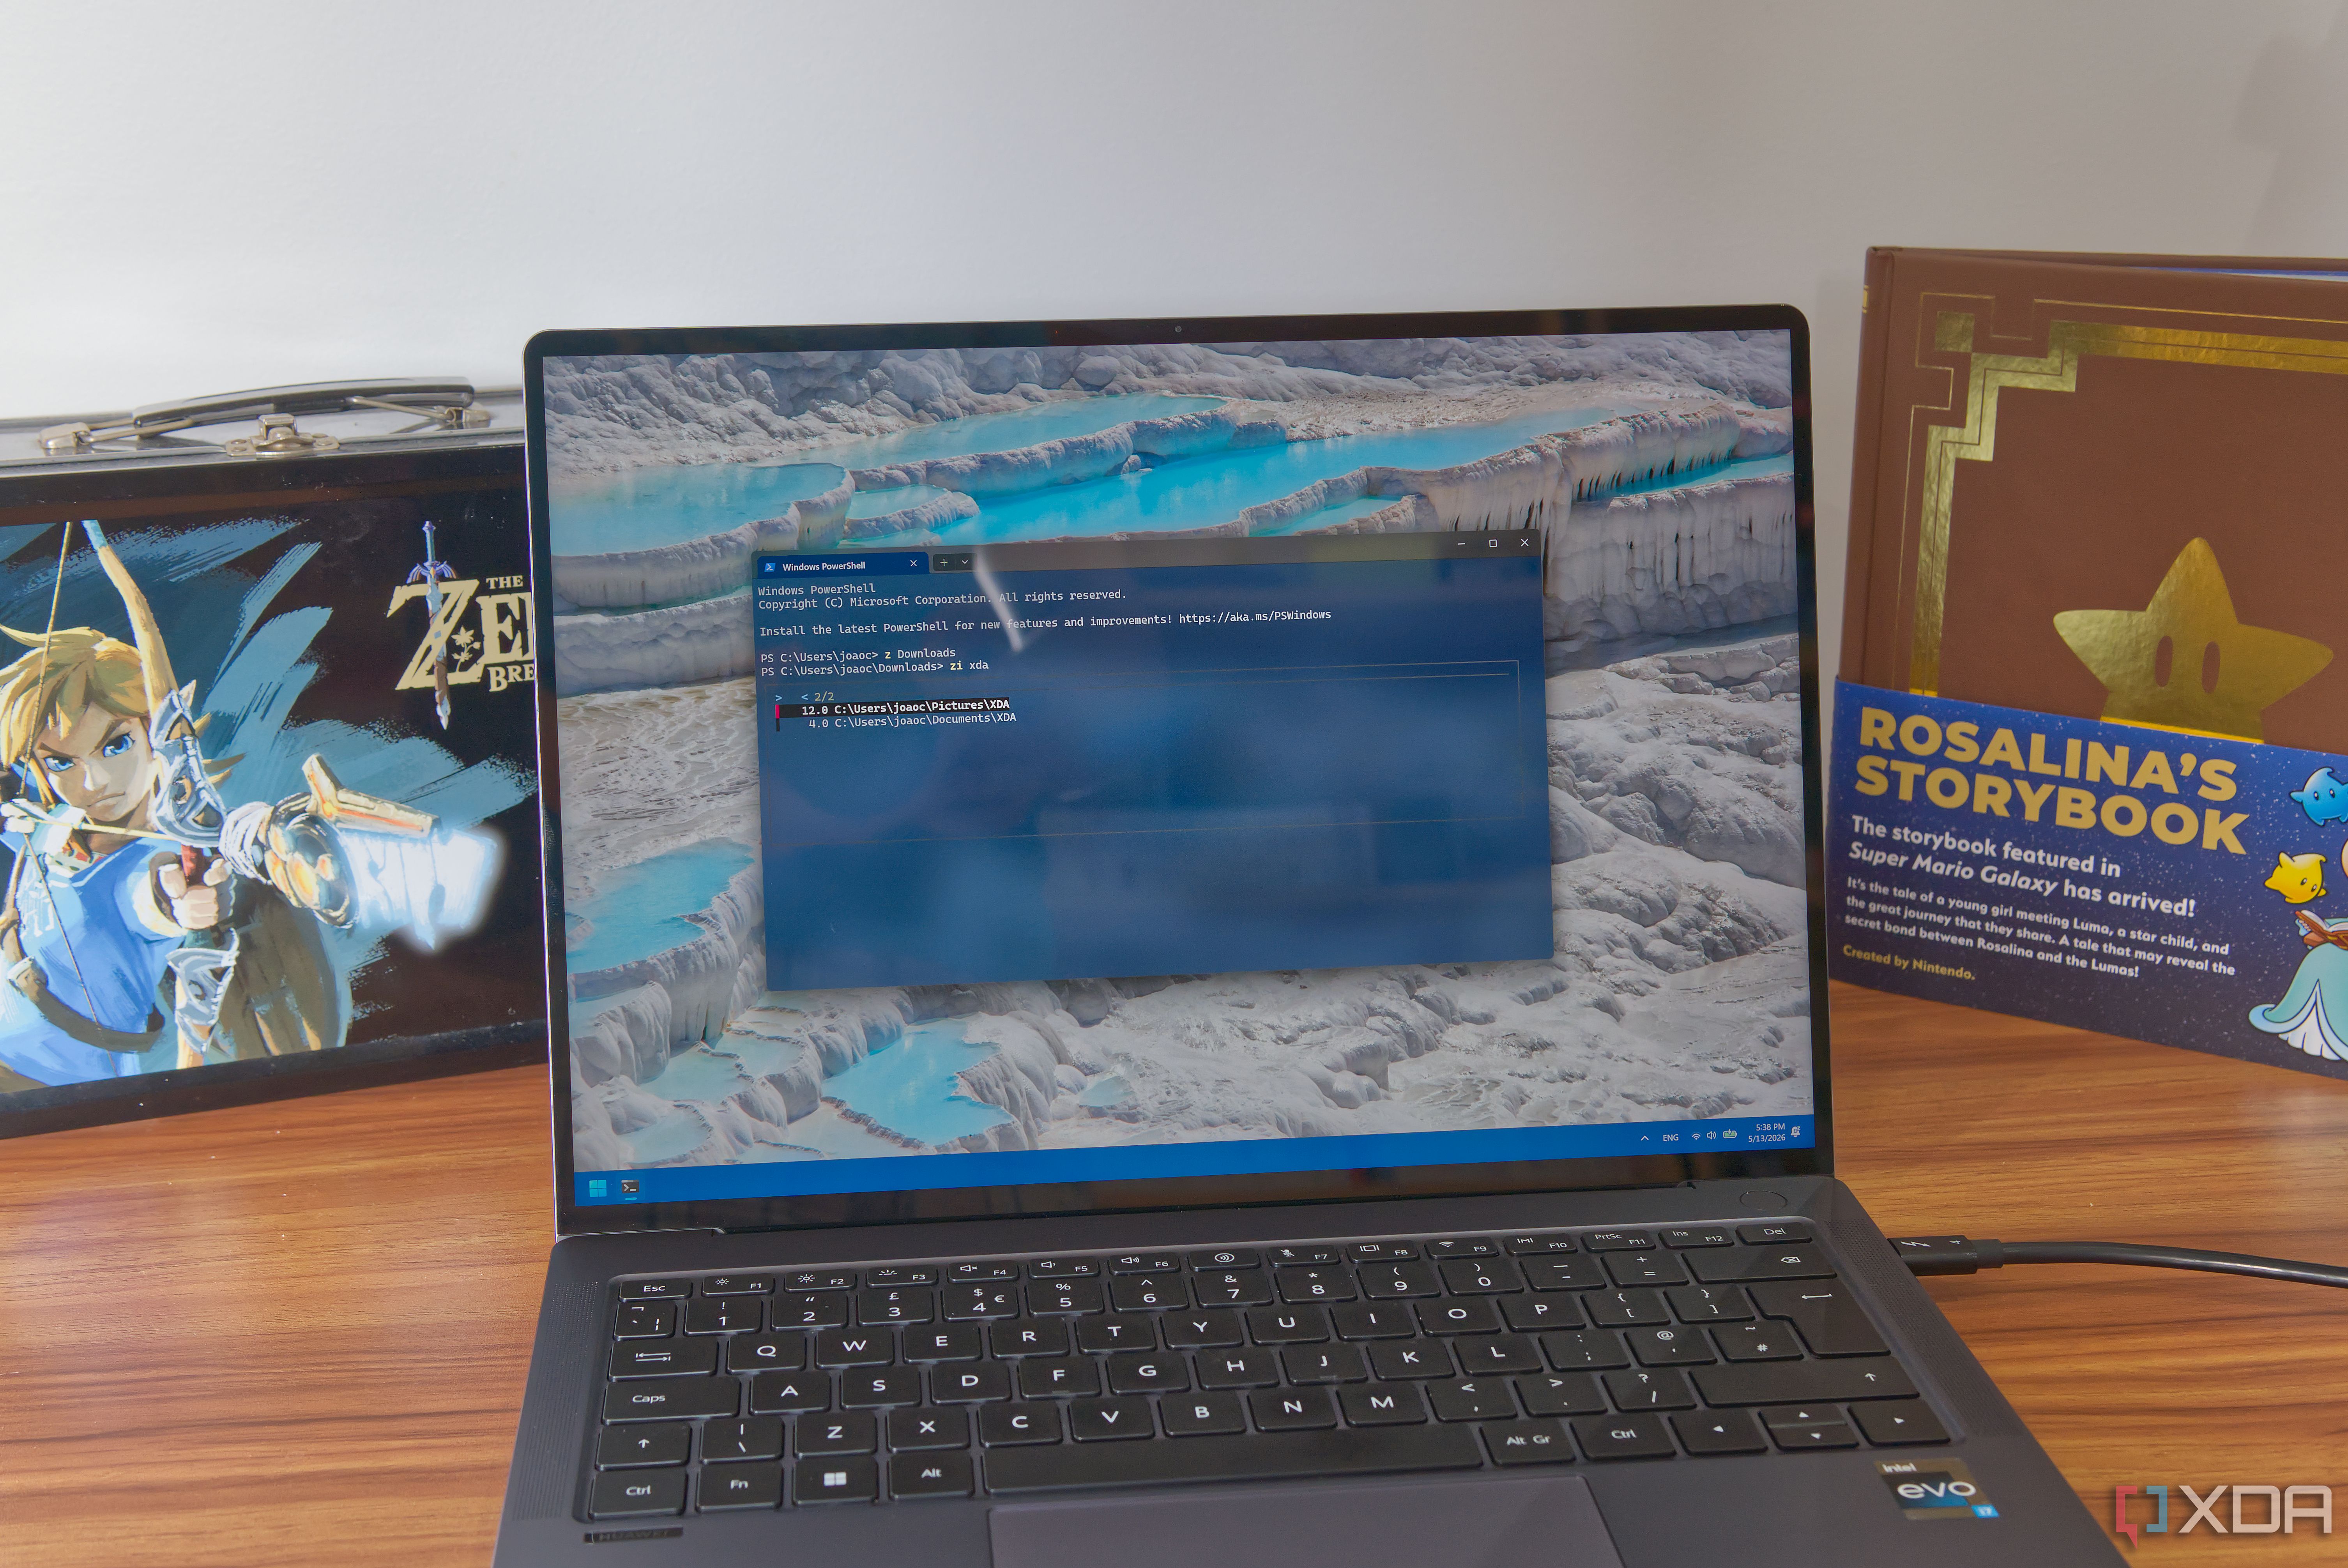
z MyAppZoxide will search its database and take you directly there, even if there are multiple matches—it picks the most frequently used. To see where z would take you without actually moving, add the -l flag: z -l MyApp.
Step 4: Explore Advanced Features
Zoxide offers several handy options:
- Interactive selection (
zi): If multiple directories match,zipresents a list you can browse with arrow keys. Useful when partial names aren't unique. - Exact match (
z 'MyApp'): Surround the name with quotes to avoid subdivision of the query (e.g., if you have a folder called 'MyApp2' and want only 'MyApp'). - Subdirectory jump (
z foo/bar): You can jump to a child directory by including the path relative to the current directory, though typically Zoxide handles full paths. - Remove a directory from the database: If you no longer use a folder, run
z --remove C:\path\to\folder.
These commands make Zoxide a powerful ally in your daily navigation.
Step 5: Add Custom Directories Manually
Zoxide automatically tracks directories you visit. However, you can also add a folder explicitly using:
z --add C:\path\to\folderThis is useful when you want to pre-populate the database with common project folders without visiting them repeatedly.
Tips and Tricks
For Best Performance
- Use a modern terminal like Windows Terminal for better rendering and support.
- Keep your PATH clean: Only include essential directories to avoid conflicts.
- Update Zoxide regularly: Use
winget upgrade zoxideto get the latest features and fixes.
Understanding the Database
Zoxide stores its database in C:\Users\YourName\.zoxide.db. You can backup or inspect it manually, though it's rarely needed. If performance degrades, resetting the database with z --purge can help—just be aware that all learned history is lost.
Integration with File Managers
While Zoxide is command-line only, you can pair it with tools like Explorer++.exe to open folders in a GUI. Create an alias: function OpenInExplorer { start (z $args[0]) } in your PowerShell profile, then call OpenInExplorer MyApp to launch File Explorer directly.
Final Thoughts
Zoxide fundamentally changes how you interact with folders. After a few days of use, the old way of clicking through directories in File Explorer will feel broken. It's a small investment that pays off every single time you need to access a deep folder. Start your journey today and never waste time on hierarchical navigation again.
Related Articles
- New 'macOS Apprentice' Tutorial Series Launches to Help Beginners Build Native Apps from Scratch
- AI Creates Hot New Job: 'Forward-Deployed Engineers' in High Demand as Google, OpenAI, Microsoft Race to Deploy
- 10 Surprising Facts About True-Spectrum Photography and Structural Color
- Coursera's New Programs: Q&A on Job-Ready Learning in the AI Era
- Medical Student Perspectives on Nutrition and Preventive Care in Modern Medical Education: A Comprehensive Guide
- Medical Education Under the Microscope: What Future Doctors Really Think About Nutrition and Preventive Care
- 10 Essential Things to Know When Starting Django
- EVM Accuracy Becomes Critical as Wireless Networks Push Higher Modulation Orders